

 |
| Abby and I think these gowns look rather like 1950s evening gowns before the sleeves go on and ruin everything! |
More 1830s goodness! All the other Gigot Girl Gang members were working diligently on their ensembles while I was in Europe. By the time I got back, the design was all marinated in my brainbox and ready for the grill, so I jumped right in!
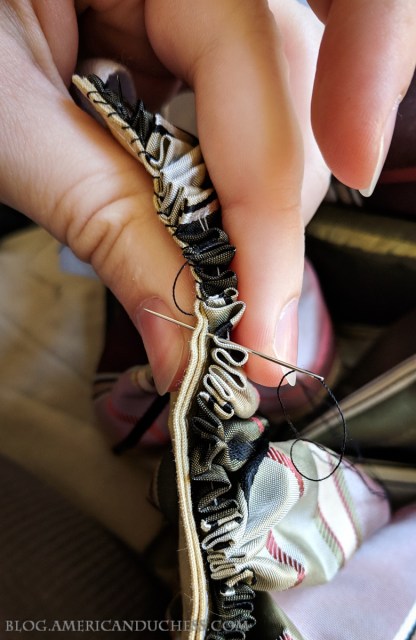 |
| The top of the skirt is turned over, then stroke gathered (cartridge pleated) and whipped to the waistband. |
 |
| Yummy finished stroke gathers of the skirt. With more experience, next time I’ll just whip the skirt to the bottom edge of the bodice waistband instead. I did it this way because the original late ’20s dress we have has a separate waistband. |
I wanted a front-closing surplice bodice. Workwoman’s Guide describes this type of bodice for older women (lol), used with a drop-front skirt. Initially I thought I could keep the skirt and bodice separate, so I whipped the stroked gathers of the skirt to two waistbands, 18th century style.
 |
| First bodice toile – looking alright, but I straightened out the neckline at top for the second version. |
Bodice fitting was a bit tricky. I did a few toiles (me? toiles…inconceivable!), and fit these tricky darts on my own body. The darts are rather extreme, but the nice thing is that darts in this period could be fit from the outside, then just top-stitched down. Abby’s original late 1820s gown has darts sewn this way, which really does make it easy to fit each side of the body specifically. So that’s what I did too.
 |
| Wacky pattern! Look at that mega dart! We’ve discovered that grain lines are *very* important for these bodices. |
 |
| First fitting! Not bad! |
With bodice fitted and trying the whole thing on over all the underpinnings and skirt, I applied the waistband, just a straight-cut strip about 2 inches wide. I quickly found that the skirt was not going to stay put under the bodice, so I stitched it all together, leaving a sortof overlap placket zig-zag opening thing with a series of hooks and bars to keep everything in place.
This seems to be the dress of doing-everything-twice. It’s a new period for me, and I haven’t sewn really anything other than 18th c. in such a long time that I did a lot of stupid things. For example, I knew I ought to face the hem…then didn’t…then had to go back and do it after the fact, eegads! I also made the waistband ever so slightly too wide so I got to go back and turn it under another 1/8″ in the round…fun! Did sleeves twice. Did skirt panel twice. Did darts twice, lol! (oh dear!)
 |
| 11 inches of organdy facing the hem. You see hem facings in original gowns and noticeably drawn in fashion illustrations from the period. Because the skirts were held aloft by starched petticoats, etc., my theory is that the skirts of gowns needed to be stiffened as well, but couldn’t be starched (starched silk? no…), so stiff fabrics were employed to keep the hems from collapsing below the bottom of the underpetticoats. |
Little by little the gown has come together. The polished cotton lining has been a great structural lining fabric for the bodice and waistband. The skirt is unlined except for the stiff organdy facing. Next…onto the sleeves.
Sleeves are a whole post of their own (and a video coming soon too), so we’ll cover those next ‘cuz they’re CRAZY!….stay tuned!

