

/Update: This tutorial is getting quite old! While it’s still a goodie, for a more in-depth look at how to make an 18th century petticoat stitch-by-stitch in the historically accurate 18th century manner, please check out The American Duchess Guide to 18th Century Dressmaking./
The cool thing about 18th c. petticoats is that they have a special and awesome way of being both adjustable and including secret pocket slits so you can access your secret hanging pockets. Petticoats can be worn as underskirts, just on their own, or you can pile them up to create extra-huge puffy skirts. They can also be worn for other big-skirted centuries. Here’s how to make one:
*NOTE: This tutorial is for petticoats worn over basic “round” skirt supports. Panniers and pocket hoops call for a bit trickier construction, but don’t worry – full step-by-step can be found in the AD Dressmaking book.
Materials & Tools
– approximately 3 – 4 yards of fabric – you need enough for the hem circumference to be at least 120 inches.
– measuring tape
– needle & thread
– iron
– ties (ribbon, twill tape, shoe laces, etc.)
– your dress form (if you do not have a dress form, you will need to have a friend help you)
Step One – Measure
Dress your form with all the underpinnings you plan to wear – bum pads, stays, petticoats, all of it – and make sure the waist measurement on your dress form is your corseted waist measurement, and that the height of the dress form is your height + the shoes you plan to wear.

Hold the width of the fabric up to the waist, allowing it to fall naturally to the floor, over the skirt supports. Allow about 1.5 – 2″ extra past where you will hem, and make a cut length-wise. With most fabrics (cotton, taffeta) you can then rip the fabric apart at that cut and be assured of a straight line along the grain. For skirts will slight trains or that need extra length to fit over extra supports in back, you will want to do this cutting manually.
Step Two – Hem
Hem the entire length first, before you pleat. At this point you still have one long piece of fabric.
Step Three – Section
An 18th c. petticoat has a front piece and a back piece, with seams at both sides. Cut your fabric in half (fold edge-to-edge, find the center point, slice and rip. You’ll need to cut where you hemmed with scissors). Now fold the halves in half again, find the center point, and mark each with a pin. These will be the center of your back and the center of your front.
 |
| This is showing the finished petticoat, but you can see the open pocket slit |
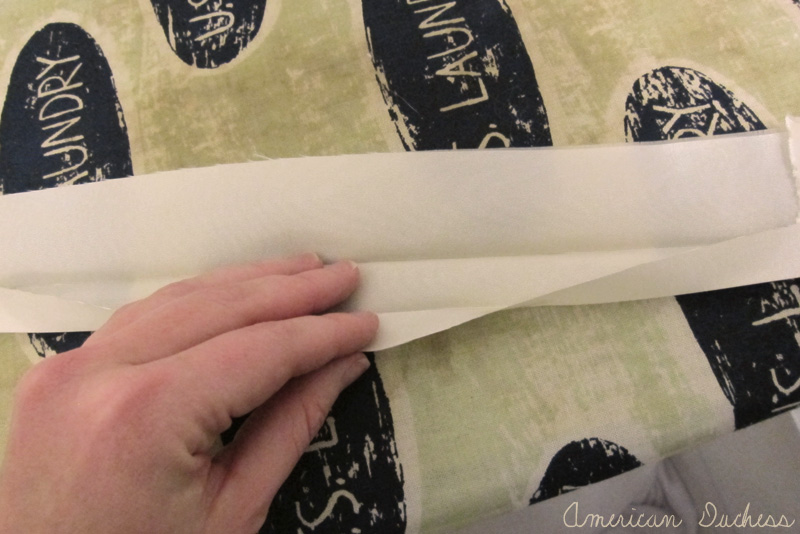
Step Four – Pocket Slits
At the top sides of each piece, double-turn a very narrow hem for a length of about 12 inches. Stitch. These will form the openings for your pockets, and also allow you to get into the petticoat easily.
Step Five – Pleat
You are welcome to measure, do math, and mark where your pleats should go, but I do it more by feel. On the back of the petticoat pleat in the direction of the center mark, so you end up with a small inverted box pleat at the centers of your skirt back. On the front section, mark the center, then about 2 inches away on each side. Knife pleat from that mark towards the sides of the petticoat, so you end up with a 4 inch flat section at center front.
Quarter your waist measurement (waist/4). This is the length each knife pleated section will need to be. Mine came out to 6.5″, so as I pleated towards the center, I measured and adjusted to 6.5″. In total, each side was 13″.

Pin each pleat as you go, then run a basting stitch along the edge.
 |
| Both sides pleated up – you can see the gap where the pocket slit is. |
Step Six – Sew Up the Sides
Stitch up both sides of the petticoat, stopping where you’ve made the pocket slit edges (about 12 inches below the waist). Reinforce this area.
Step Seven – Waistband
I like to create a waistband from a single piece, folded over the raw edge like bias tape – or just use double fold bias tape! If you want it to match, though, cut a wide piece of your fabric, at least 3″ or wider, and the length of your sections of the waist + seam allowance (so +1″ if you are using 1/2″ allowance). I cut two strips 15″ long, 2.5″ wide.

Fold the strips in half length-wise, press, and then fold the edges in again and press. This is just like double fold bias tape, but the waistband does not need to be cut on the bias.
With right sides together, match raw edges (so you are folding one edge out again) of the waistband strip to the pleated waist of the skirt. Stitch, then turn the waistband up, along the center fold, over to the inside, and stitch on the inside. I finish the inside by hand for a nice clean edge on the outside, but you can also do it on the machine.

Before you stitch the ends of the waistband closed, you want to insert your ties. I used ribbon, and wrapped a length around my waist, then cut that in half. You want to be sure you have enough length of ribbon so that it can wrap to your back or front, and tie easily. Insert the ties into the ends of your waistband and stitch closed. Reinforce so the ties don’t pull out.

Getting Dressed
When you put on your new petticoat, first carry the ties from the back around to your front and tie. Then, lap the front piece over the bow you just made, and tie in back. You can leave the ties in back, or tuck them in.
*Note: tying in front and back like this makes the waist fit perfectly, whereas tying the ribbons together on the sides will limit how tightly the waist can be closed.
 |
| Tie in front first |
 |
| Tie in back |
Now you have a fresh new petticoat! This is the basic method, and you can add ruffles, flounces, cut the length shorter, just be creative with future petticoats. Remember, with 18th c. skirts it’s all about the volume, so pile on the petties!
Here’s a handy video showing how to get fully dressed and tie the petticoat:


46 Comments
Sheena
February 10, 2011 at 9:56 PMThis is AWESOME! Thank you so much for posting it. I have put off making one for so long cause I was so confused on how to make one that would look right and be functional.
Rebecca
February 10, 2011 at 9:58 PMI do a different era, Victorian, but we use hoops. How do you make volume with petties, without the waist getting larger too?
Unknown
April 13, 2021 at 2:46 PMtry adding gores to the sideseams / back
admin
May 16, 2021 at 5:54 AMThanks for the tip. Gores aren’t accurate for 18th century petticoats, which actually makes them much easier to construct – just great big rectangles. 🙂
A Baronets Daughter
February 10, 2011 at 10:46 PMdo you have a tutorial on regency? im still trying to make the perfect one.
Lauren Stowell
February 10, 2011 at 10:58 PMSheena – glad to be of help! I hope the instructions are clear, but if you have questions, feel free to e-mail me.
Rebecca – the way to avoid bulk at the waist is to make a yoke and mount the pleated skirt on that – that is, it's a smooth bit around the waist, and the pleats for the skirt start further down. Sometimes you see 1950s crinolines like this too. If you want multiple petticoats, check out Demode's advice on making a crinoline using a yoke and hooks/bars: http://demodecouture.com/crinoline/
Mrs. Strange – I haven't done any petticoats for Regency, but that's definitely in the recent future, as I have 2 Regency gowns upcoming. The closest I've come is this bodice petticoat: http://americanduchess.blogspot.com/2009/04/i-can-see-your-regency-underwear.html
Artemisia Moltabocca
February 11, 2011 at 12:39 AMSo THAT'S how to recreate side pockets without the craziness of a single waistband! Thank you. *bookmarks*
staffordcastle
February 11, 2011 at 1:53 AMA variant of this method, also beautifully adjustable, is to cut the back half of the petticoat an inch or so longer at the top, and make this into a casing. The ties from the front half-waistband go through this in opposite directions, and voilá!
Jennifer Bieniek
February 11, 2011 at 2:50 AMIf you were using a particularly expensive fabric for your petticoat that went under a gown would it be completely unrealistic to use a different fabric for the back panel?
Jenny
Lauren Stowell
February 11, 2011 at 3:01 AMMarissa, that was done quite a lot. Decoration for petticoats worn under open-fronted gowns was also often only on the front half. If you do use a different fabric, restrict it to the back panel, and make sure it matches closely in color.
MrsC (Maryanne)
February 11, 2011 at 6:13 AMVery cool! I thought that bias would stretch but of course the ties are holding the tension around the waist aren't they.
I made my wedding dress underskirt by putting a pretty but much cheaper satin jacquard on the part hidden by the overskirt, as I used dupion silk I bought 20 years earlier and there wasn't enough. Worked a treat. Not that my dress was historically accurate (except possibly to a regency production of midsummer night's dream) but it's nice to know one is following in one's forebear's footsteps hehe.
Lauren Stowell
February 11, 2011 at 6:58 AMand by "recent future" I mean…just…near future. it's been a weird day.
Rowenna
February 11, 2011 at 1:18 PMGreat tutorial! Can I add a couple things I've found making petticoats? One: for thicker fabric, you might be better off with less yardage–I've found that about 3 yards of heavy linen for "workaday" petticoats does fine (but where's the fun in that, I know lol). Two: I pleat the front and back into box pleats with a wider pleat at the centers and grading down to smaller pleats (and "floofier") sides. So the front lays flat more easily, and my bony hips get a little extra help. You might think I'd want a floofy bum, too, but I tend to spill things on myself…so like that the petti is double sided so I can do a switcharoo to the backside if need be.
This is an awesome tutorial–I'll be sending starting-out seamstress friends here to get a good grasp on how to make a petticoat (and proof of why the "drawstring method" is not only incorrect but unnecessary).
Unknown
June 15, 2016 at 4:13 AMLove the fluffier at the sides and my bum and sides need extra! Thanks for that info!
Jennifer Bieniek
February 11, 2011 at 7:34 PMRowenna:
LOL I have to admit most of my skirts are drawstring (hanging my head in shame) they are just so much faster. But after diving into some of these blogs and seeing how much nicer the pleated ones hang I am converting my ways!! I'm looking forward to my first properly made petticoat!
Jenny (using my daugther, Marissa's google acct!!)
Lyric
July 9, 2012 at 8:53 PMHoney, don't hang you head in shame. My back-in-the-day style petticoats are drawstring too. Here's the thing . . . I am NOT always going to be this size and I am working smarter and not harder as in I don't want to take down a waistband and re-do it for losing weight. When I get to my ideal weight then I MIGHT be concerned with not using the drawstring. Pssst . . besides, if it is good enough for Ms. Jennifer Rosbrugh it's good enough for me (and you).
Lauren Stowell
February 11, 2011 at 7:34 PMRowenna, good call! I think I will try that method next time – I like having the floof, but not so much in the front.
Yes, there are many ways to do this, not just mine! The key is to have the front and back separate, to tie around the waist, and to sew the sides together 10"+ below the waistline, but other than that, go at it any way you like!
Lauren Stowell
February 11, 2011 at 7:37 PMHey Jenny – I think the drawstring has its place in the costuming world, but it gets difficult when you have a lot of fabric that needs to go flatly under a bodice edge, so you reduce the bulk by pleating. Also, if you have on multiple petticoats stacked atop one another, it helps to reduce the bulk.
Jennifer Bieniek
February 11, 2011 at 10:58 PMAnd it just looks prettier!! LOL
Angela
February 12, 2011 at 12:53 AMLauren, this is awesome! Thanks!
Lauren
February 12, 2011 at 2:55 PMGreat post 😀
Rowenna
February 12, 2011 at 10:47 PMJenny–no shame! I always thought drawstrings would be easier, but it's crazy how much more comfortable and nicer-looking the waistband is. No awkward petticoat-waist bunching 🙂
Anonymous
February 16, 2011 at 4:39 AMHad to send this etsy link to you. They look like half stays or something.
http://www.etsy.com/listing/67694003/vintage-camp-fan-lace-corset-boned-waist?ref=sr_gallery_36&ga_search_query=girdle&ga_search_type=vintage
Becky Cosby
May 19, 2012 at 8:58 PMDo you have a tutorial anywhere for that 18th century jacket? 🙂
American Duchess
May 19, 2012 at 9:03 PMHi Becky – no, but it was based on a pattern in Janet Arnold's "Patterns of Fashion."
Becky Cosby
May 21, 2012 at 3:24 PMDrat 🙂 I bought a pattern but can't find it 🙁 I did find a copy of Gausault's Art of Tailoring that I was able to download. Unfortunately, it's in French, and an older French at that….
I used the waistband method you described above for the first time this weekend. I've done some research about Colonial period clothing but never saw reference to this. Do you have references you can post? I'd love to read more!
I modified it a bit by making the front half a bit shorter than the back half. This way, I can be sure that the slits for the pockets get overlapped. It came out GREAT! I'm so relieved I found your page! My teenage daughter is at that stage where she feels fat, feels thin, feels fat, on and on. This is a perfect method to make sure the skirt will fit no matter what! Yea 🙂
Lyric
July 9, 2012 at 8:48 PMThis tutorial is on point. Bless you. I'm going to link to this from my blog (never know who is listening and it may help them too). 😉
Asymmetrical
September 6, 2012 at 3:48 AMDo you have documentation for this method of petticoat making? I've been making my petticoats like this for years, but now can't find documentation supporting this method.
Lauren Stowell
September 6, 2012 at 5:46 AMCheck out Janet Arnold's Patterns of Fashion 1, as well as Costume Closeup, and Costume in Detail. I believe it was Janet Arnold's book that first turned me onto making petticoats this way, so many years ago.
Lauren Stowell
September 6, 2012 at 5:48 AMCostume in Detail shoes a petticoat tying this way on pg 59, but side-tying definitely wasn't the only way – there are others in Costume in Detail showing ties at the back, or on ones side only.
Anonymous
March 26, 2013 at 8:28 PMHi! Great tutorial. 🙂 Do you have one for tucking petticoats? I'm trying to figure that out now…
Unknown
May 25, 2013 at 2:41 AMHow far off the ground is this petti hemmed? I'm assuming one wouldn't want it to actually touch the ground but how high is too high? Thanks in advance!
Lauren Stowell
May 25, 2013 at 4:09 AMHi Allegra – some petticoats went right to the floor, and some were shorter, about ankle length, and even a little higher, known as "walking length." Walking length petticoats were more for undress, less formal occasions, while the floor-length were worn for all occasions. I would say (from experience) that mid-calf is too high.
Unknown
November 2, 2015 at 3:52 AMThis comment has been removed by the author.
Unknown
November 2, 2015 at 3:59 AMHi Allegra,
By now I'm sure you've made several petticoats but this may help others starting out.
The 18th C covers a wide range of fashions and social customs just as our past 100 years does. It's not just about fashion, it's about what surrounds you. If an individual is just starting out and doesn't yet know all the answers to the following questions, don't worry, it will come with time and research. In the mean time, a good basic starter length is at the ankle. If later on you need longer or shorter, this one can be used as an under petticoat or it can be hemmed/put in a growth pleat.
The length and type of petticoat is highly dependent on "when" (choose a year or short span of years), "where you are" (city, country house, village, fort, frontier), "where you come from" (ethnicity), "who" you are (Lady of the house, merchant's wife, farmer's wife, street seller, camp follower, dressmaker, indentured servant [and to whom], etc,) and "what" you do (oversee a fine house, maintain and provision, raise children, serve, learn a trade, etc.). Settling on the answers to those five factors will guide you to what length (and the overall style of clothing) is appropriate.
If you were in the city or a country house, well-off, didn't do any manual labor, and had servants, your length was often to the ground (someone else took care of the cleaning). For dances, the front would be just on top of your toes (less tripping) and often with a train that could have a wrist loop or more commonly be bustled up on buttons (very much dependent on "when").
If you were in the merchant class (but still not doing manual labor), you still wanted to be fashionable but you might be doing your own laundry or sending it out – approximately toe top to ankle length.
The working class was much more practical about the hem length. To lessen wear and tear and for safety when doing manual labor or working around a cook fire or hearth, ankle or a bit higher was very common. Depending on "where you come from", the hem could be even higher. The Dutch working class wore theirs at mid-shin, shocking the British ladies.
Marie
May 10, 2016 at 7:03 AMHi!
Thank you for a wonderful tutorial!
Do you happen to have a post for making one to fit over panniers?
Unknown
August 10, 2016 at 8:36 AMYou need more fabric. Wider and longer. I asked her the other day.
I just bought myself a pair of cheap curtains for a large window and used those.
Unknown
June 10, 2016 at 10:09 PMI have a question when it comes to the first few steps, my brain isn't processing this:
"Hold the width of the fabric up to the waist, allowing it to fall naturally to the floor, over the skirt supports. Allow about 1.5 – 2" extra past where you will hem, and make a cut length-wise. With most fabrics (cotton, taffeta) you can then rip the fabric apart at that cut and be assured of a straight line along the grain. For skirts will slight trains or that need extra length to fit over extra supports in back, you will want to do this cutting manually.
Step Two – Hem
Hem the entire length first, before you pleat. At this point you still have one long piece of fabric."
I'm confused if we cut it in the first one, how do we have one length? Does width equal fabric width, and length is yardage? Or the other way around?
Lauren Stowell
June 11, 2016 at 4:37 AMHi Unknown – Sorry about the confusion. Yes, I do mean the width or hem circumference where I say "length" the second time.
Unknown
September 15, 2016 at 5:10 PMWhat's a good fabric to use as more of an everyday petticoat? Wool, linen, some type of cotton, what's a good weave? I also would like to use this with some of my Renaissance Costuming although I know it's not totally accurate for them (I'd rather have correct 18th century then Renaissance), so I'd like a fabric that could kinda go with both. Thanks!!! I love the simplicity of this tutorial!
– Lauren (name twins 🙂
Unknown
October 13, 2016 at 9:40 PMUnless specifically designed to be decorative, undergarments (shift, petticoat, etc.) would usually be made from cotton or linen, as these materials could be washed more easily/frequently than wool or silk, without being damaged. Plain, twill, and satin weave would all be period accurate, but for an everyday petticoat, plain weave would be the most common.
Unknown
October 23, 2016 at 7:54 PMThank you so much for this tutorial. I successfully made my petticoat after buying the Simplicity Pattern only to question…..why should I cut the fabric into 3 then 6 pieces for the skirt….this was so much easier. I used 4 yards of suiting plaid, halved that into the front and back and bingo! followed the rest of your instructions and I now have my skirt. I did wait until it was completed before hemming though as the back needed and extra inch or so because of my my bum roll. So excited to eventually start the bodice.
Lauren Stowell
October 23, 2016 at 9:31 PMSweet! Glad you found this ole tut useful. The three panels front and back has to do with loom widths. Historically fabric width was much narrower, so they pieced together the panels to get enough circumference. We still have different widths today – 36", 45", 58", 60" are common – so the Simplicity pattern had to account for the narrower widths. You don't have to do the three panels though. If your fabric 60" wide just a front and back works perfectly.
Kathryn
November 13, 2017 at 3:11 AMThis comment has been removed by the author.
Kathryn
November 14, 2017 at 1:36 AMThis comment has been removed by the author.
Bev
September 12, 2023 at 10:25 PMThank-you so much for this wonderful post! I’ve learned so much and can’t wait to try it! My husband and I are going to a family wedding where all guests are asked to attend in costume. We decided to attend in Outlander/Colonial wear! We will not be historically accurate in every way at all, but we are doing the best we can. We are having so much fun getting it all together! Thank-you again!
Bev