

There was never a better time to start something than so close to a deadline, but with just a couple days of hard graft, I’m surprised and relieved that the gown is actually almost done!
 |
| Something along these lines. Initial sketches for the gown design |
As I mentioned before, I couldn’t find a pattern for what was in my head. I decided to alter an existing pattern instead, the raglan-sleeved Simplicity 2406 I used to make my Miss Fisher blouse earlier this year.
 |
| Ideas for altering a raglan sleeve bodice |
I slashed-and-spread the bodice to add in width to then be gathered at the neck edge and below the bust. Not too hard, just required a lot of tape. The really challenging part, though, was the sleeve.
 |
| My muslin mock-up. I thought the weight and drape of the velvet would sort out that sleeve. I was wrong. |
I wanted a big puff sleeve, so I slashed and spread the lower half of my sleeve pattern to create a large bell shape. My intention was to gather that lower edge, interline with tulle, and stitch it to a lining that was shorter in length, so it would pull the puff under and up to create the volume.
 |
| The sleeve in velvet wasn’t looking any better. I pinned a tuck in to see if I could fix it to my liking, but me no likey, so time for Plan B |
That didn’t work. Altering a set-in sleeve for that effect would be no problem, but a *raglan* sleeve…well, it was beyond my feeble patterning skills.
Quick change on the fly! I picked out all those shirring stitches on the sleeves, cut a facing for the cuff, and shirred it all again, turning under the cuff and securing the stitches. They’re not the big 1933 poofs I had envisioned, but I’m really happy with the sleeves now.
 |
| Quick sketch with Plan B sleeve construction |
There’s another thing I’ve learned the hard way on this project – shirring. Shirring in its most basic state is not difficult. You run many lines of gathering stitches, pull all the threads up, and there ya go, right?
Wrong.
You gotta secure it, and stitching across the end ain’t gonna do it. I know this because that’s what I did, thinking it was all grand, and then all the shirring pulled out of the neck as soon as I went to put the bodice on the dress form! UGH! Shirring has to be secured to some sort of lining. I’m using lightweight dupioni silk that happened to be the same color. I’ve turned facings on the neck edge and sleeves and stitched over the gathering stitches, through both layers. If I have time I’ll pull the gathering stitches out, too.
 |
| The neckline turned with a facing, and the shirring stitched through |
Now the bodice is pretty much done! I gathered the bust edges and stitched on the front and back skirt pieces, leaving the side seams open until the very last. I’ve used the same pattern piece for the both front and back skirt. This may seem like a no-no, but my secret is that the velvet is actually *stretch* velvet and it’s cut on the bias.
(I’ve become a stretch velvet convert, as a substitute for silk velvet, which can be hard to find and afford. Why? The stretch velvet has been easy to work with, does not crawl when pinned together, is robust enough to withstand picking out lots of stitches, drapes amazingly, is washable, and doesn’t leave velvet droppings everywhere. As always, choosing the right fabric for the job is important: I would never ever ever recommend this material for historic periods prior to the Aesthetic movement, but for drapey, “watery” velvet creations of the 1920s, 30s, and 40s, heck yes)
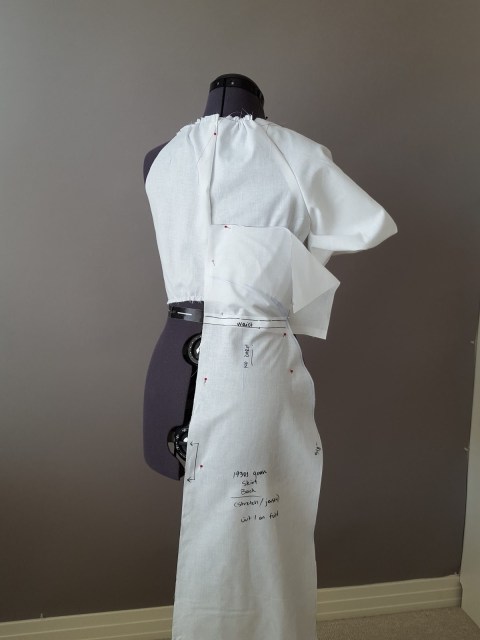 |
| Working out the skirt pattern in muslin, using a basic straight 1930s skirt sloper, omitting the dart for a shaped side seam, and adding a bit at the top to meet the empire waistline of the bodice. |
I’ve treated this like a knit, omitting darts and going for side seam shaping only. There was no need for separate front and back skirt panels, but there will be a need for some seriously smoothing underpinnings. All ’30s gals know, we must “ensure our figure lines!”
 |
| Nearing completion! The belt is a stand-in, obviously. |
My last tasks are to stitch up the side seams, add a loop and button for the neckline closure, make the belt with the sparkly buckle, and hem. I can surely do that all in just an afternoon. Then it’ll be done for the Christmas party next weekend!


20 Comments
Stephanie Lynn
December 3, 2015 at 10:28 PMLooks lovely! I'm not making a Christmas dress this year but I do have several old ones that need to be worn!
Lucy
December 4, 2015 at 12:40 AMI love seeing your design process at work from the inspiration through the sketches and mock ups. This dress is turning out beautifully!
Where do you get your stretch velvet? I have a project I was thinking I needed silk velvet for, but after seeing this dress I'm thinking stretch velvet might be a better and certainly more affordable option.
Lauren Stowell
December 4, 2015 at 12:42 AMThank you! I get almost all of my fabrics at a local shop called Mill End. I'm not sure where to find it otherwise – online, I suppose, but I'd get swatches before ordering yardage, just in case it looks a little too shiny-shiny.
Carla
December 4, 2015 at 1:07 AMOh that's a darling dress!!! I sort of want to make a dress for Christmas, but I've got finals to worry about first.
I had no clue stretch velvet doesn't get everywhere, good to know!
Carla, Tiny Angry Crafts
Lauren Stowell
December 4, 2015 at 8:10 PMAh, I remember trying to sew during finals, haha! I made a Victorian dress in 4 days so I could go to Dickens Fair, way back in 2005. Probably wasn't the best use of my time 🙂
AuntieNan
December 4, 2015 at 4:37 AMUnbelievably pretty, miss L!!! Great color and I'm glad you made the shirting work because it just begs for it. My grandma made a shir red bodice for me using a zigzag stitch over elastic thread. Worked like a charm.
Lauren Stowell
December 4, 2015 at 8:11 PMShirring is a brave new world for me. I was never interested in it before, but I made that 1940s Hollywood pattern in knit a couple months back and it had shirring on it. Now I kindof love it, but I need to practice the different techniques more. I've seen a couple different ways to handle it, one being the way you're talking about. Must try!
Gina
December 4, 2015 at 5:26 AMOooooooh….this is going to look so luscious!! How exciting! This is going to look beyond incredible!
Blessings!
g
Lauren Stowell
December 4, 2015 at 8:11 PMThank you!
Lauriana
December 4, 2015 at 6:33 AMThat looks lovely!
I've been wondering about using stretch velvet for vintage looks. It is so much easier to find.
About stabilizing shirring (in the case of that neckline, you need a facing to stabilize anyway), I have also had success (usually for little bits, more in the middle of the garment) with just stitching over the gathering lines with a normal stitch. And, like AuntieNan mentioned, for shirring that has to be stretchy, you can use elastic thread on the bobbin. Or, with lots of time on your hands, you could do it the old-fashioned way, by hand (one of these days I will make something with hand-shirred details…).
Lauren Stowell
December 4, 2015 at 8:13 PMI'll try that! For the small bits it makes sense, and would save bulk I think. I'll also try the elastic thread in the bobbin. That would be incredibly helpful on certain fabrics and designs!
AuntieNan
December 4, 2015 at 9:04 AMI forgot about the bobbin possibility—grandma just laid it flat on the wrong side and zig zagged a "casing" over it she secured the row ends, but didn't top stitch the stretchy section.
Some really beautiful work ideas here! Happy party going, all!
N
Lauren Stowell
December 4, 2015 at 8:14 PMLike cord gathering? Just a lot of it? A more secure gathering method – I've used it for long lengths of petticoat ruffles and liked it much better than pulling up the darn thread and, of course, three out of five times it breaks, haha
PinhouseP
December 4, 2015 at 9:43 AMIt looks lovely! I wish I could find a good source of velvet near me. I can only get the crumpled shiny poly stuff, and that won't do. Looking forward to seeing you in the finished gown 🙂
Lauren Stowell
December 4, 2015 at 8:14 PMCrushed velvet, ugh! I remember seeing it used on a gown in Braveheart and I just wanted to die. Hahhaa
Cate
December 4, 2015 at 9:48 AMOh wow, it looks amazing! Sorry to hear you've had all those problems but at least you got there in the end and in record time too. You've actually inspired me as I was really struggling with what style sleeve to have on my Christmas dress and I love the one you've ended up with. I think I'll try something similar but with a narrow cuff rather than shirring, so thank you for sharing!
Lauren Stowell
December 4, 2015 at 8:15 PMI'd call them "learning experiences," hahaha. Nothing too bad, just wasted a lot of thread, but got there in the end. 🙂
Negerrose
December 4, 2015 at 10:59 AMI love your bodice!!! It's precious your pleated in the waist!!!
Lauren Stowell
December 4, 2015 at 8:15 PMThank you!
Bianca Esposito
December 5, 2015 at 7:05 PMThis is looking so gorgeous, what a beautiful color! I definitely assumed it was silk velvet until I read your notes about it being stretch, now I am reconsidering stretch velvet entirely! I am currently stalled on my own velvet holiday dress project (a late 40's/early 50's number) because I am procrastinating sewing a zipper into velvet!